
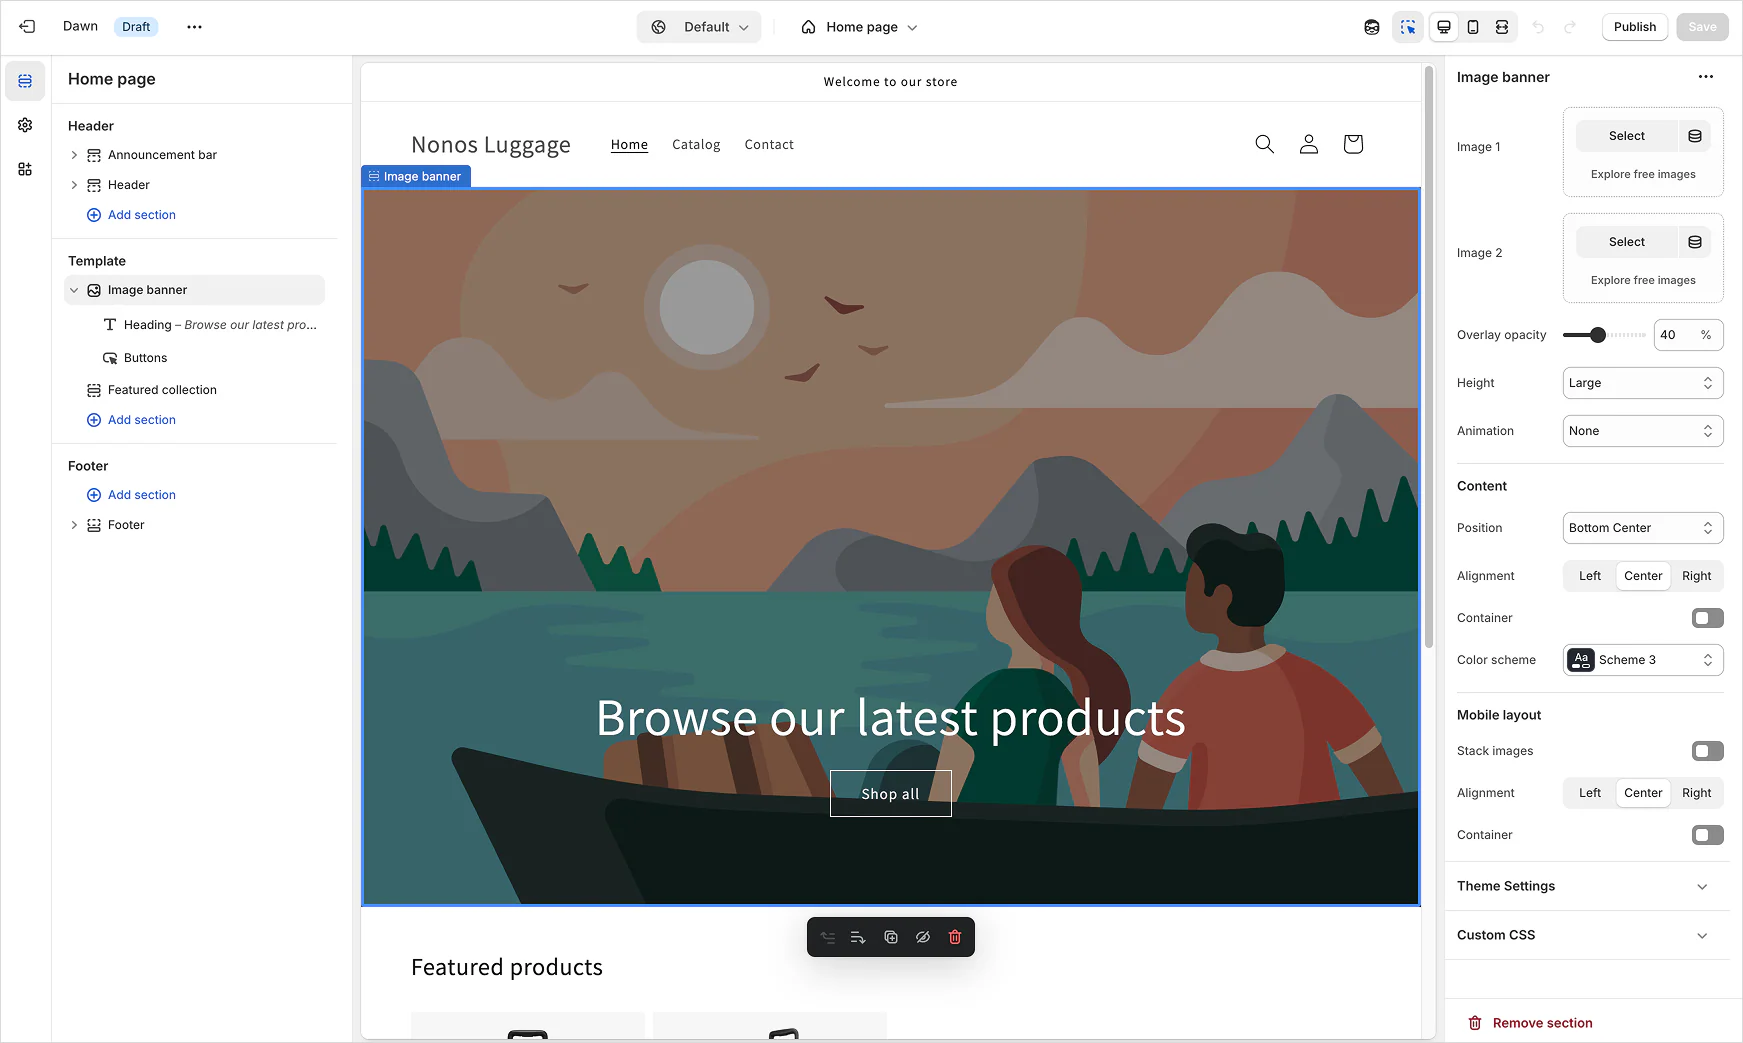
Build a storefront that makes your first collection easy to choose. A customer should be able to see the product clearly, compare the right options and understand what ordering involves. You can achieve that with a small, considered range and a theme you can maintain.
Shopify is one optional route. If a public social account and a reliable ordering process suit your current stage, start with our Instagram selling guide. This article is for people who have decided that a separate storefront would help their business.
Prepare your materials before starting the trial
Gather your business contact details, a short description of your customer, photographs you have permission to use, accurate product specifications and a draft fulfillment process. Choose a few products you can actually supply. Having these materials ready makes the trial useful for building and testing instead of searching for missing information.
Shopify’s US pricing page currently advertises a three-day trial followed by $1 per month for the first three months on most plans. Eligibility and local offers can differ. Check the offer presented to your account, the ordinary subscription price, payment fees and optional app charges before committing. A low introductory subscription does not include your inventory or other operating costs. Check Shopify’s current pricing.
Make one small collection easy to navigate
Write a one-sentence store promise: “We select [products] for [customer or occasion], with [useful reason to choose us].” Use it to decide which products belong together. A short, coherent collection is easier to explain than several unrelated categories with incomplete descriptions.
Sketch your navigation before opening the theme editor. A practical first menu is Shop, About and Contact. Put delivery, returns and privacy information in a clearly labeled footer. Give collections descriptive names that a new visitor understands; clever names can be supporting copy.
Create the store with accurate business details, currency and contact information. Use a business inbox you check regularly. Record who owns the domain and account, and keep recovery details somewhere secure. The person helping with design should not be the only person who can recover access.
Use a restrained theme setup
Dawn is a free Shopify theme you can consider alongside other themes. Preview it with your own photographs before choosing. A theme that looks good with a large editorial shoot may behave differently with your first five product images.
Keep the first homepage focused: a clear introduction, your starting collection, a brief reason behind the selection, and service information. Choose one readable body font, one heading style and a small color palette. Use the same image proportions across product cards. Check contrast and button labels on a phone, where subtle pale text can disappear.
Replace every demonstration photograph and sample claim. Leave out testimonials until you have permission to publish real ones. If you show supplier photographs, confirm usage rights and ensure they depict the exact finish, size and variant you sell.
Build product pages that answer buying questions
Each listing needs a clear title, price, useful photographs, dimensions, materials, what is included, relevant care guidance and fulfillment information. Explain variations with words and matching images. If a photo shows several items but the listing sells one, make that explicit beside the purchase controls.
Photograph or measure a sample whenever possible. For a pouch, show usable dimensions and closure; for stationery, state sheet quantity and paper size; for jewelry, identify the exact material and fit. Avoid unsupported claims copied from a competitor. Write the search title around what the product is and a meaningful distinguishing feature.
Keep unavailable items out of the live purchasing path until you have a truthful way to describe availability. A planned assortment can remain in draft while you confirm stock. Do not invite customers to pay against a dispatch promise you have not tested.
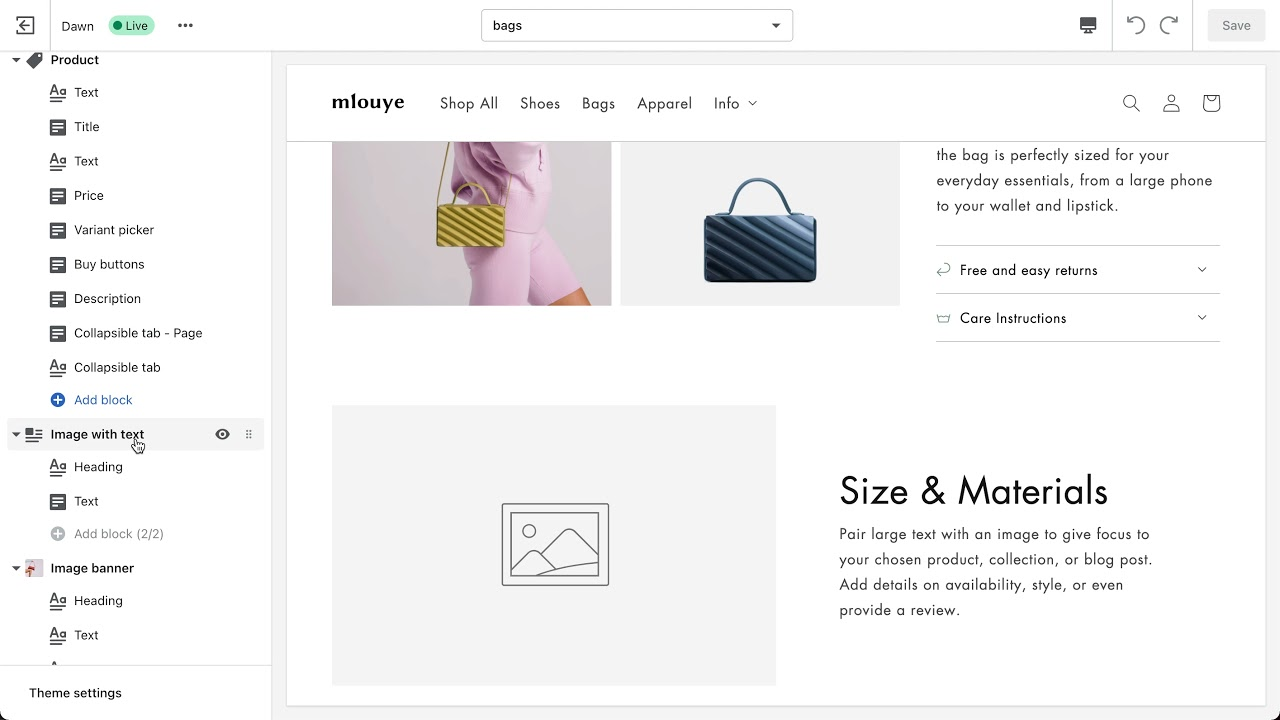
- Choose the product template and locate its title, variant picker, buy buttons and description.
- Add a useful size or material section using your own accurate product facts and images.
- Check the exact variant, mobile layout and purchase controls before saving.
▶ Watch the product-setup video embedded in Shopify’s official guide
Write policies from your actual service
First decide where you ship, how often you dispatch, how tracking is provided, how customers request help, and how you handle returns. Then write the public explanation. A copied policy that promises next-day dispatch creates work you may not be able to fulfill.
Use platform policy tools as a starting point and review the text against your actual business and applicable requirements. Fill every placeholder and remove irrelevant passages. Shopify’s official setup checklist covers payment, shipping, tax settings, policies and test orders. Work through those operational settings before launch, and seek qualified local guidance for questions specific to your business.
A checkout test has a visible finish.
Practice checklist only. Answers stay on this page and are not submitted or saved.
Run a complete phone test
Follow your future customer’s route from the profile or post that introduces the store. Open a product, choose a variant, add it to the cart and use an appropriate test payment method. Confirm the delivery option, total and confirmation message. Also check what happens when a payment fails or an item is unavailable.
Ask a friend to find the delivery policy and contact method without help. Record where they hesitate. Fix those points before spending time on another homepage animation. Your first launch needs a working route through the store and a realistic way to bring people to it.
A practical STYLR-style listing exercise
Hypothetical exercise: imagine a collection of everyday hoops, a simple chain and a ring offered in several sizes. Give each listing a clear product image, one useful wearing image and exact material and fit information. The ring needs a size selection that changes the selected variant correctly. The hoops need a clear statement that the price is for a pair. Use this exercise to find the information your own products need; it is not a ready-made inventory recommendation.
Your first-store worksheet
- My first customer and buying occasion: ____________________
- The products I can reliably supply: ____________________
- Where that customer will discover the store: ____________________
- My monthly cost after the introductory period: ____________________
- My dispatch schedule and customer response window: ____________________
- Missing photo or specification for each product: ____________________
- Phone test completed by / date / issue to fix: ____________________
Use the starter kit to turn these answers into a working checklist. If buying wholesale is the next step, review Faire retailer readiness; owning a Shopify account by itself does not establish purchasing eligibility. If the product direction is still unclear, take the starting-point quiz before adding more products.
A $300 test budget is not $300 of stock.
Illustrative allocation only: $40 + $120 + $30 + $110 = $300. Replace with actual quotes. Other costs may include platform, delivery, payment fees and selling costs. This is not a guaranteed launch budget.
FINISH THIS STEP, THEN CONTINUE
Test your storefront, then check readiness
Your product information, contact details, delivery policies and buying path are clear and tested. A working storefront alone does not establish wholesale eligibility.
Put the checklist to work.
Get a personal starting plan, the printable workbook, and a starter kit with setup checklists, editable worksheets and social-post templates.
Find my first step + get the kit →See your summary first. Request the complete plan and files by email. No purchase required.